

Fuji DL-200 Battery Replacement Guide
Replacing the battery Fuji didn't want you to change, over 40 years later.

In 1983, Fuji made the not-so-futureproof decision that the consumer had to send their Fuji DL-200 back to the factory to get their batteries replaced. Luckily, changing the battery at home in 2025 is merely a 10-minute job with almost no tools required.
Note: there is a later version of the DL-200 where the batteries are user replaceable. The models with the soldered in batteries have white text around the lens, the one with the replaceable batteries have yellow. In Japan, the second model was also clearly labeled as the DL-200 II, but in other markets, this was not the case. If you have that model; congrats! This guide is not for you, and I would reccomend you to follow this guide by JFR Film on YouTube instead.
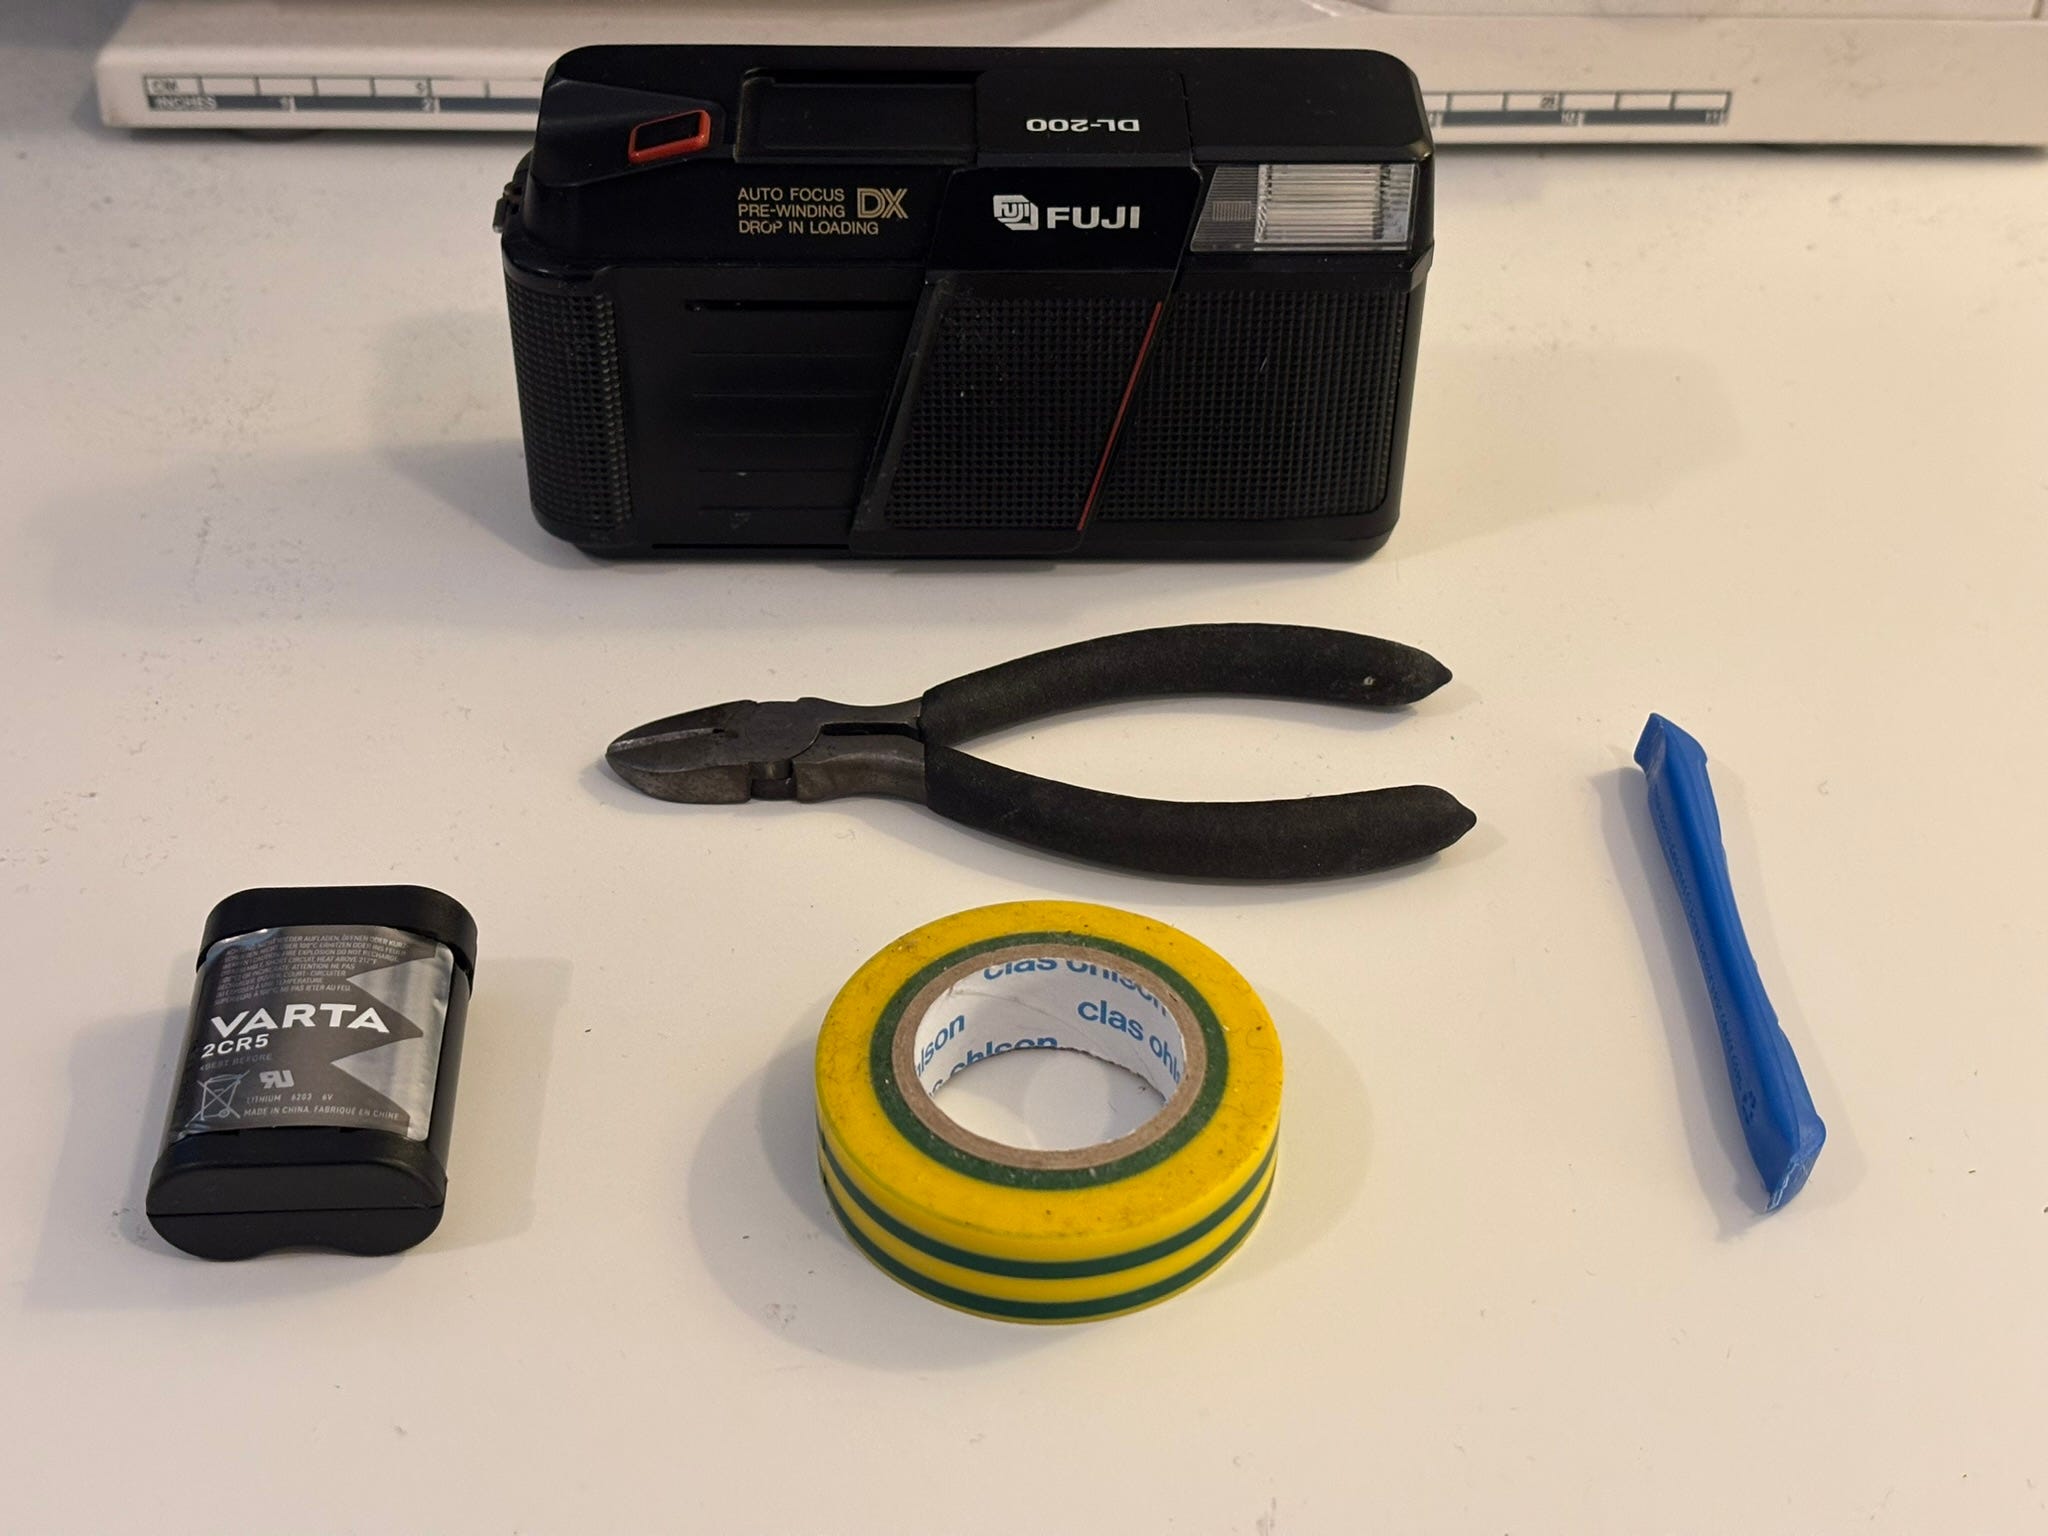
What you need
A 2CR5-battery
A spludger or something long and thin to carefully remove the battery
Electrical tape
Side cutter pliers or similar
Step-by-step guide
Start by opening the film door. Should the camera be loaded, remove the film. Should you be halfway in a roll — the DL-200 has a pre-winding system where the film is first rolled out in its entirety, and then rolled back into the film canister after each exposure, keeping your already taken pictures safe from light, instead of your unexposed film as a regular camera would.
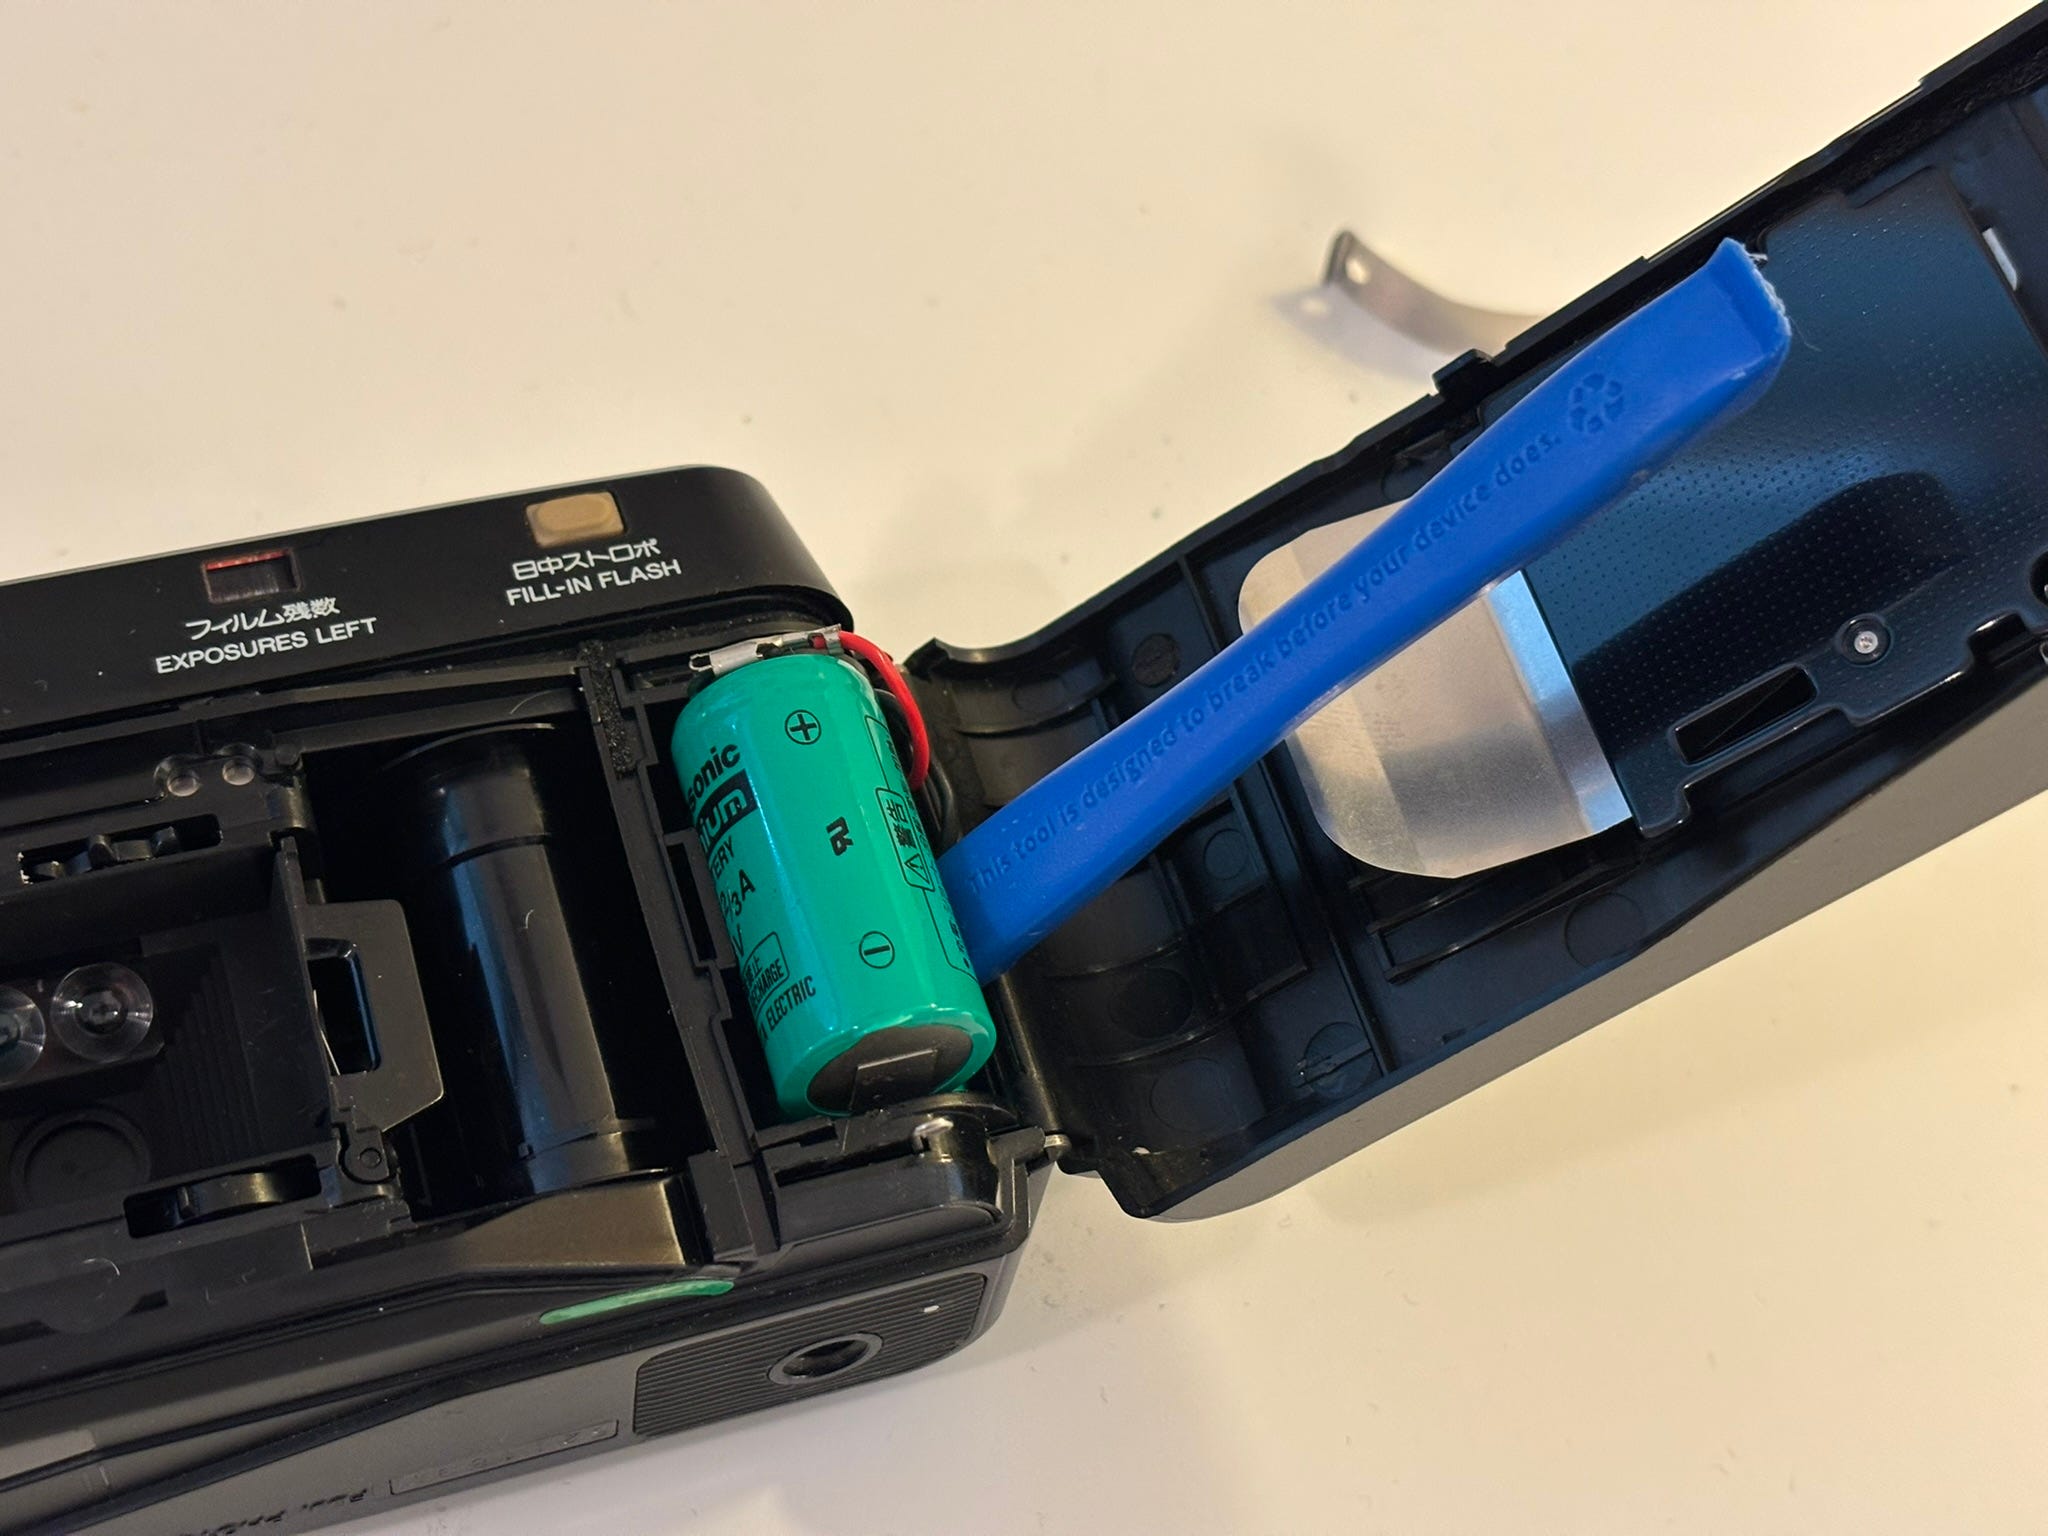
Carefully lift up the metal arm (left picture) and open the film door fully. You‘ll see the battery on the right side.


Carefully remove the metal band holding the battery in place, and use the spudger to gently pry out the battery. It’s a tight fit and the camera housing or the wires might be damaged if you’re not careful enough, so take your time.

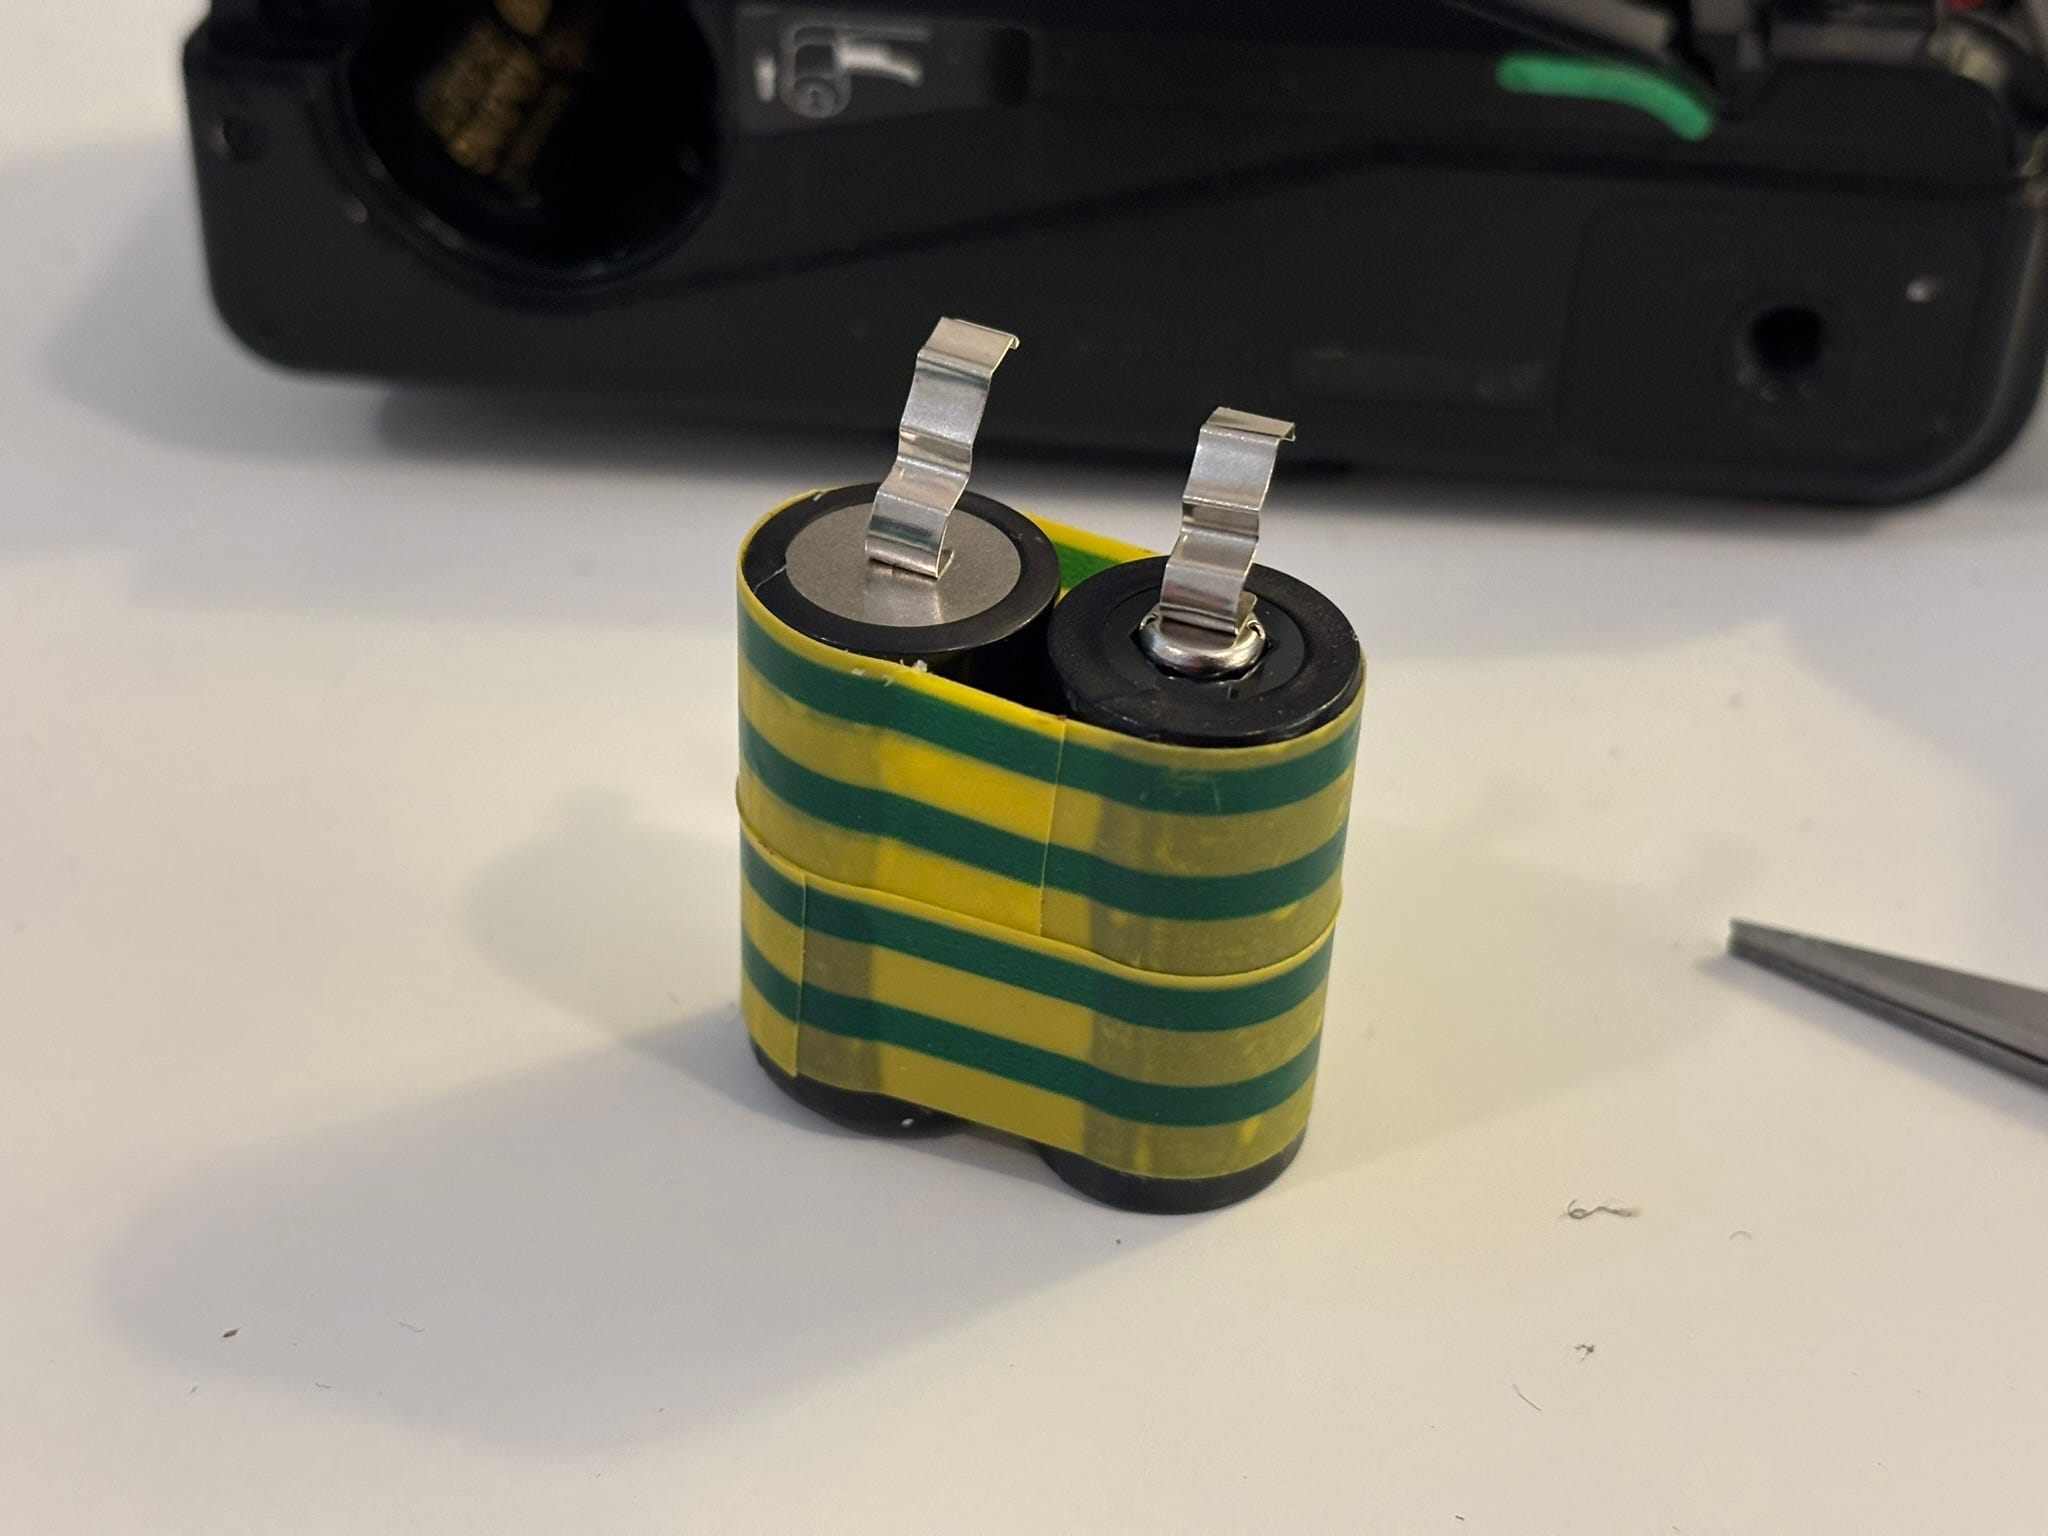
Take the 2CR5 battery, remove the sticker, and carefully use the pliers to snip open the bottom seam of the plastic housing. It should remove rather easily, but be careful to not damage the metal tabs!
You should now be left with two battery cells (CR123 for you battery nerds out there) that are spot welded together on the bottom, and with metal tabs spot welded to each of the top terminals.


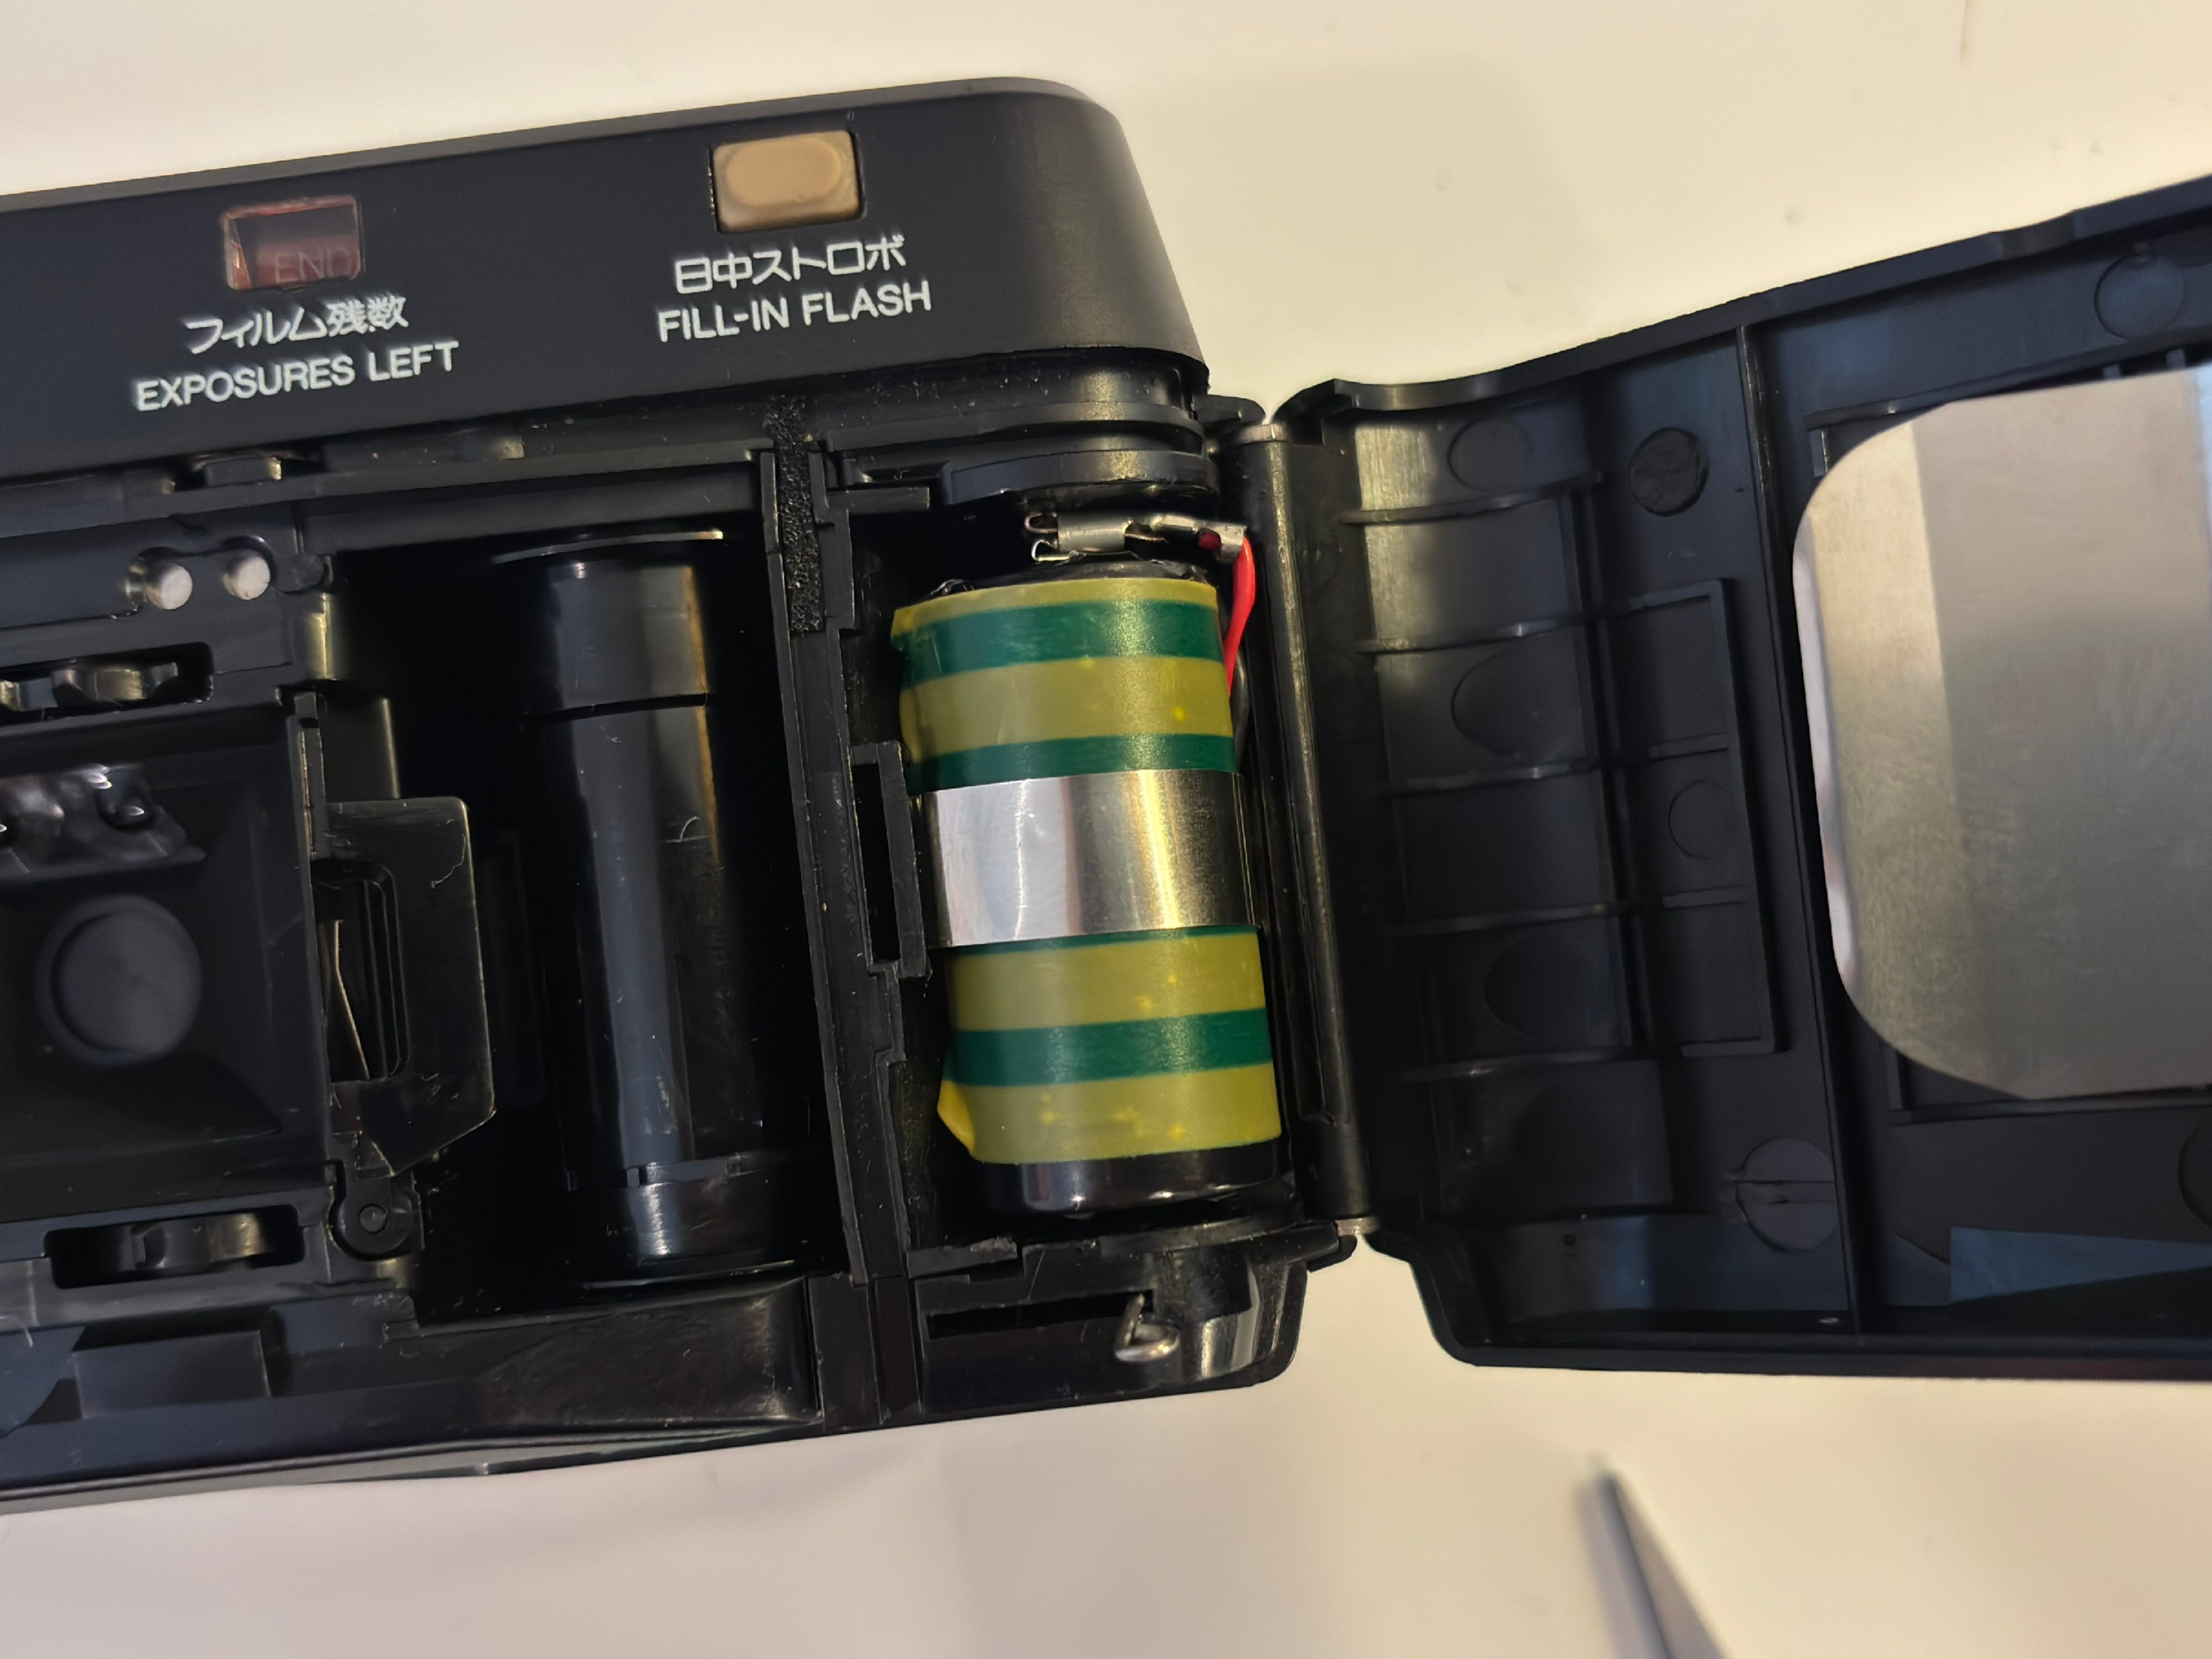
Tape the battery cells together for extra stability, but be careful not add a too thick tape layer, as the fit is really tight already.

Cut off the tabs at similar length as the tabs on the original battery.
Remove the wire connectors carefully from the original battery, and attach them to the new battery.
It’s important to attach the right wires to the right terminal! The red to the positive (black on the battery), and the black to the negative (silver on the battery). Failing to do so will make the automatic winding system go crazy when you try the camera, resulting in the camera eating up your roll of film.
You might need to bend or cut the tabs a little bit to make the connectors fit.


Insert the new battery, but careful not to pinch the wires between the battery and the camera body, as they could get cut. Replace the metal band. Put the metal arm on the film door back in it’s tiny hole, and close the door.


And that should be it!

If the light by the viewfinder lights up red, try half pressing the shutter button a couple of times until it lights up green, or let it sit for a minute.
Fuji says the battery will last for 1000 shots, if half of them uses flash. That should last you 5 years if you shoot 8 rolls of 24 exposures a year. But I guess some of you freaks will burn through that battery in much less than that.
Feel free to ask in the comments should you have any questions!